책에서 이번에는 Mysql연동에 대해서 이야기를 하던 와 중 '시퀄라이즈'라는 것이 언급되었습니다. 이전에는 C#과 같이 MySql을 사용했었지만 이번에는 node에서 사용하다보니 조금 더 쉽게 사용가능하도록 만든 거 같습니다.
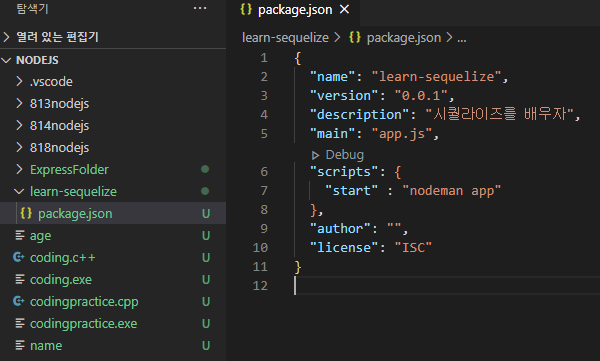
일단 npm init으로 생성한 package.json을 저렇게 바꿔주었다.
main과 스크립트의 start만 대충 시작해보았습니다.
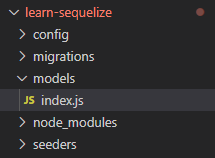
npx sequelize init 을 하니 갑자기 폴더가 여러개 생기면서 다운 받아지고 models의 index.js에도 상당한 양의 코드가 있었는데 불필요한 코드는 제거했습니다.
const Sequelize = require('sequelize');

const env = process.env.NODE_ENV || 'development';
const config = require('../config/config')[env];
const db = {};

const sequelize = new Sequelize(config.database, config.username, config.password, config);

db.sequelize = sequelize;

module.exports = db;
그리고 app.js에 mysql을 연결
const express = require('express');
const path = require('path');
const morgan = require('morgan');
const nunjucks = require('nunjucks');
const { sequelize } = require('./models');
const app = express();
app.set('port', process.env.PORT || 3000);
app.set('view engine', 'html');
nunjucks.configure('views', {
express: app,
watch: true,
});
sequelize.sync({ force : false })
.then(() => {
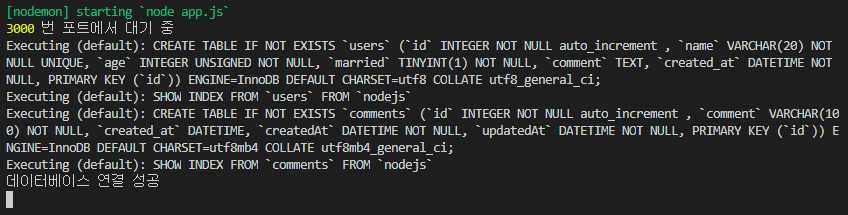
console.log('데이터베이스 연결 성공');
})
.catch((err) => {
console.error(err);
});
app.use(morgan('dev'));
app.use(express.static(path.join(__dirname, 'public')));
app.use(express.json());
app.use(express.urlencoded({ extended : false }));
app.use((req, res, next) => {
const error = new Error(`${req.method} ${req.url} 라우터가 없습니다.`);
error.status = 404;
next(error);
});
app.use((err, req, res, next) => {
res.locals.message = err.message;
res.locals.error = process.env.NODE_ENV !== 'production' ? erro : {};
res.status(err.status || 500);
res.render('error');
});
app.listen(app.get('port'), () => {
console.log(app.get('port'), '번 포트에서 대기 중');
});
sequelize.sync를 통해서 연결한 것을 볼 수 있습니다. force를 true로 하게 되면 테이블이 변경될 때를 고려하여 매번 테이블을 로드시키는 역할을 한다고 합니다. 일단 여기서는 false로 설정하였습니다.
const Sequelize = require('sequelize');

module.exports = class User extends Sequelize.Model {
    static init(sequelize){
        return super.init({
            name: {
                type : Sequelize.STRING(20),
                allowNull: false,
                unique: true,
            },
            age : {
                type: Sequelize.INTEGER.UNSIGNED,
                allowNull: false,
            },
            married: {
                type: Sequelize.BOOLEAN,
                allowNull: false,
            },
            comment: {
                type: Sequelize.TEXT,
                allowNull : true,
            },
            created_at:{
                type : Sequelize.DATE,
                allowNull: false,
                defaultValue: Sequelize.NOW,
            },
        }, {
            sequelize,
            timestamps: false,
            underscored: false,
            modelName: 'User',
            tableName: 'users',
            paranoid: false,
            charset: 'utf8',
            collate: 'utf8_general_ci',
        });
    }
    static associate(db) {}
};
다음은 인덱스와 연결시켜줄 user.js입니다. 들어있는 것들이 name, age, married, comment, created_at 이런식으로 사용자가 필요한 정보들을 미리 설정을 해서 나중에 연동을 해서 값을 받을 때 수월하게 받을 수 있도록 조정해주는 것 입니다.
여기서 allowNull은 NOT NULL, UNIQUE는 unique 처럼 다른 단어로 치환하여 속성을 부여합니다.
마지막 중괄호는 테이블 자체의 속성을 가지고 있습니다.
timestamps를 true로 하면 자동으로 created_at와 updated_at를 생성
underscored는 createdAt를 created_at로 변경
paranoid는 삭제가 일어나면 row를 삭제하는 것이 아니라 deleted_at에 삭제된 시간을 줘서 차후에 복구할 때를 위해서 true로 설정
이렇게 각자의 역할이 존재합니다.
const Sequelize = require('sequelize');

module.exports = class Comment extends Sequelize.Model {
    static init(sequelize){
        return super.init({
            comment:{
                type: Sequelize.STRING(100),
                allowNull: false,
            },
            created_at: {
                type: Sequelize.DATE,
                allowNull: true,
                defaultValue: Sequelize.NOW,
            },
        }, {
            sequelize,
            timeestamps: false,
            modelName: 'Comment',
            tableName: 'comments',
            paranoid: false,
            charset: 'utf8mb4',
            collate: 'utf8mb4_general_ci',
        });
    }

    static associate(db) {}
};
위의 user.js와 비슷하게 comment.js를 설정시켜 주었습니다. 여기는 comment에 관한 모델이 만들어집니다.
이렇게 2가지를 작성을 완료합니다.
const Sequelize = require('sequelize');
const User = require('./user');
const Comment = require('./comment');

const env = process.env.NODE_ENV || 'development';
const config = require('../config/config')[env];
const db = {};

const sequelize = new Sequelize(config.database, config.username, config.password, config);

db.sequelize = sequelize;

db.User = User;
db.Comment = Comment;

User.init(sequelize);
Comment.init(sequelize);

User.associate(db);
Comment.associate(db);

module.exports = db;
그리고 외부 모듈로써 두 파일을 받아서 index.js에서 연결시켜 줍니다.
여기까지 시퀄라이즈의 힘을 빌려서 데이터베이스의 모델을 만들고 연결까지 완료입니다.
'공부 > Node.js' 카테고리의 다른 글
| [Node.js] 시퀄라이즈 (3) (0) | 2020.08.24 |
|---|---|
| [Node.js] 시퀄라이즈 (2) (0) | 2020.08.24 |
| [Node.js] 넌적스 (0) | 2020.08.21 |
| [Node.js] REST (2) | 2020.08.18 |
| [Node.js] 버퍼와 스트림 (0) | 2020.08.14 |

